Showing posts with label Edible Magazine. Show all posts

10/1/11

Crunchy Granola a Whole New Generation


A fun craft to serve your creation in
My latest article from Edible Fall 2011
Stone's Soup Corner
Crunchy Granola a whole new generation...
When I told my parents 18 years ago that I was moving to California, they labeled me as "crunchy granola." I was pretty offended. After all, I wasn't a hippie; I was a modern 20-something heading to San Francisco to seek out conversations about art in cafés with Beat poet types! They also asked me when I was coming back, to which I replied "never."

After a year or so in San Francisco, I decided to set aside my artist's tools and take up cooking–the right choice, looking back. The joke is on me because now one of my favorite recipes is what I call "Grab and Go Granola." I guess I was "crunchy granola" after all!

The ways of Woodstock may be gone, but the tradition of making healthy homemade snacks is alive and thriving. These days, "health food" is not just for love-in breakfasts or others on the fringe; it is mainstream. Snacks like granola are soaring in popularity and it seems every time you turn around there is a new gourmet granola on the market shelf. There are fruity ones, nutty ones, even regular-old cereals masquerading as granolas. A great way to ensure that your family truly is getting a healthy, wholesome granola is to make your own–and it's an easy and fun activity for kids, too!


KITCHEN CRAFT

In the cooking and gardening camps at Napa's Connolly Ranch, we teach the kids to make pots for seedlings out of newspaper. These paper pots are also a fun way to serve snacks like homemade granola. You can use newspaper or even plain copier paper or construction paper for colored snack cups. This is a fun and creative activity for parties and play dates, too. Try making different shapes, like squares or rectangles!

Materials needed:

Sheets of paper
Tape
Markers or crayons
A can (vegetable or soup cans work well)

To make:

1. Cut or fold the paper so that you have a piece that is long enough to fit all the way around the can (with a slight overlap) and is about 1 inch higher than the height of the can.

2. Wrap the paper around the can and tape the seam to seal the paper around the can–but not so tightly that you won't be able to slip it off.

3. Fold one end of the paper under the can to form a bottom for your cup.

4. Tape the seams to secure the bottom.

5. Have your child draw a design on the paper, then slip it off the can.

6. Fill your cups with your homemade granola or any other dry snack.

Grab and Go Granola 

Granola is easy to make and store and it is delicious plain or as a topping. Try it on yogurt! My recipe below is easy and adaptable. Add more or less of any ingredient to your liking and it will always be delicious. Experiment with different types of nuts and dried fruits–dried blueberries or cranberries give it a flavorful punch. Make a double batch because it will disappear quickly.

Yield: About 6 cups

INGREDIENTS

1 cup shredded unsweetened coconut (Note: Using large-flake coconut adds a great chewy texture.)
4 cups rolled oats
1/2 cup wheat germ or flax meal
2 cup unsalted sunflower seeds
2 cups almonds, coarsely chopped
2 tablespoons sesame seeds or flax seeds
2 teaspoons ground cinnamon
1/2 teaspoon ground nutmeg
1 cup maple syrup
1/4 cup honey 1/2 pound butter, melted
3/4 cup dried currants or golden raisins

TO PREPARE

Preheat oven to 350° F.

Spread coconut on a baking sheet and place in the oven for about 5 minutes, checking constantly. Once coconut starts to toast it will brown quickly, so keep an eye on it. Bake until the edges are golden, then remove from the oven and transfer coconut to a shallow dish to cool. Once cooled, crush to break apart into individual strands.

Decrease the oven temperature to 300° F.

Line two baking sheets with parchment paper and set aside. In a small pan, melt honey, maple syrup and butter and set aside to cool.

In a large bowl, combine oats, wheat germ or flax meal, sunflower seeds, almonds, sesame seeds or flax, cinnamon and nutmeg, then stir well to combine.

Pour melted honey, maple syrup and butter mixture over oat mixture, then stir well to combine. Spread on parchment-lined baking sheets and bake at 300° F. for about 25 minutes, until lightly golden. Check often to make sure it does not burn. Remove from the oven and allow to cool, then break up any large chunks with your hands and add the coconut and dried fruit. Store in an airtight container.


Stumble Upon Toolbar

3/2/11

Mucking it up in Spring!


Article from: Edible Marin and Wine Country — Spring 2011

Stone's Soup Corner

For those of us who live in Northern California, spring is all about waiting for the rains to end and the sun to arrive again, and, thankfully, it always does. During this time of year, there is a lot to be done to prepare the garden for summer planting. It's also a great time to talk to your kids about what you are going to plant so that they will be excited about taking care of the garden and harvesting and eating what you have grown–and getting dirty in the muddy veggie patch! So, put your rain boots back on and go get dirty with your kids in the Spring muck!


Try my recipe below for "Swamp Soup," and I bet you will get your kids to not only eat their vegetables, but love them. The trick here is to hide a few beans in the bottom of their soup bowl and tell the kids to eat to the bottom of "the swamp" to find the "muck beetles"–and yes, I made that up. By the time they get to the bottom of the bowl, the soup will have magically disappeared. The soup itself is delicious, packed with green vegetables and will warm you and your kids up on a chilly Northern California spring day.

Swamp Soup

Yield: 4 servings

INGREDIENTS

4 cups chicken or vegetable broth, divided in half

1 medium onion, finely chopped

2 cloves garlic, finely chopped

¼ teaspoon ground nutmeg

2 cups zucchini, thinly sliced (about 3 whole squash)

2 medium ripe avocados, peeled and with the pit removed

½ teaspoon salt or to taste A handful of cooked organic black or pinto beans Prepared pesto (optional)

TO PREPARE

In a large saucepan, bring 2 cups of the broth to a boil with the onion, garlic and nutmeg. Reduce the heat to low, cover and simmer for an additional 15 minutes, stirring occasionally. Next, add the remaining 2 cups of broth and the zucchini and bring back to a boil. Reduce the heat to low, re-cover and simmer for an additional 15 minutes. Remove the lid and allow the soup to cool slightly.

In a blender, purée the slightly cooled soup mixture with the avocado, in batches, until it reaches a smooth consistency. Return the purée to the saucepan, add salt to taste and warm gently. To serve, place a few of the beans in the bottom of the bowl and gently pour in the soup. When you serve it make sure to tell the kids to eat to the bottom to find the muck beetles!

OPTIONS:

• If you don't want to open a whole can of beans for this recipe or take the time to soak dried beans and cook them separately, just pick up a few at your grocery store's salad bar.

• Add a dollop of pesto to this soup after you purée it for an extra punch of flavor and a green color.

• Float strips of toasted bread or crackers on top of the soup and place a bean on one so your kids can make the "bean bug" "jump" from log to log.


KIDS' CRAFT–SCIENCE IN THE KITCHEN

Looking for something fun and educational to do with your kids over a long weekend or spring break? Try this project using dried beans that will teach them a little science and gardening know-how. Setting it up is a great inside activity on a rainy day. Beans sprout very quickly so they are fun to watch and this experiment works well for kids of all ages.

In this version of the old-school experiment you use different liquids–milk, water, salt water and sugar water–to find out which one causes the beans to sprout in the shortest amount of time.

Things you'll need:

4 empty cups

1½ cups of water

½ cup milk

1 teaspoon sugar

1 teaspoon salt

4 paper towels

20 dried beans

4 plates

Steps of the experiment:

1. Fill 3 cups each with ½ cup of water, and a 4th cup with ½ cup of milk.

2. Add the sugar to 1 of the cups that contain water and add the salt to another, leaving 1 with just plain water.

3. Soak 1 paper towel in each cup for 1 minute, or until saturated.

4. Label each of the 4 plates with one of the following: water, milk, salt-water and sugar-water.

5. Place 5 beans on each plate, and cover loosely with the saturated paper towel that corresponds to the label on that plate.

6. Observe the growth of the beans each day for several weeks, making notes on the number of beans that have sprouted on each plate, as well as the length of the sprouts. Determine which liquid was the most successful at causing the beans to sprout.

7. Once the beans sprout, you can plant them in dirt and keep them growing!


Stumble Upon Toolbar

9/2/10

Churros Or "Squirros"– by Any Name They Are The Same

STONE'S SOUP CORNER Edible Marin Wine Country Magazine

These may not be the most low cal treat but a great holiday sweet. Make a bunch and serve them instead of bars or pie.


A few months ago I was in San Rafael and stumbled upon a small churro stand, hidden deep in the area commonly referred to as the "Canal." The ladies who run the stand are very nice and extremely passionate about churros. Of course I had to buy a few of the cinnamon and sugar redolent treats because, I thought to myself, "Everything in moderation, and I am only going to eat one, but I can't leave my family out." I did actually give them one–to share!

Churros are a Spanish invention. Many centuries ago, Spanish shepherds used to make churros while tending sheep high in the mountains. The name "churros" was derived from the most common breed of those sheep–the "Churra"–because the pastry looks like the sheep's horns.

Having only limited cooking supplies, the shepherds needed to come up with a snack that could be easily made and cooked over an open fire. Churros were a brilliant solution, easy to prepare and cook in a pan of oil. I am sure they were getting their protein and veggies at their main meals, because one can't live on fried dough alone!

Today, crispy, sweet churros can be found in most places in the world, especially those with a significant population of Spanish descent. Each area, or maker, might have its own version. In Spain, you see people dredging them through a mug of thick drinking chocolate before eating. In Mexico, the churro is sometimes filled with thick pastry cream.

Many cultures fry dough-based foods for special occasions like holidays and festivals. These foods are not eaten on an everyday basis, but are special to families or stem from a tradition. Jewish people fry sufganiyot, jelly-filled doughnuts, at Hanukkah. American Indians make savory fry bread. The American South has the hush puppy. The beignet is from France. The bunuelo is from South America. Modern Americans love any variety of doughnuts, anytime. There are hundreds more versions of these fried dough treats and they are all different–some sweet, some savory, some chewy, some dusted with sugar, some messy, but all delicious.

Making or eating these foods is a way for people who live far from their homeland to connect and feel a part of their culture and heritage.

Churros are easy and fun to make at home–and muy sabroso! Since we don't have sheep at our house, we appropriately named our version of the treats "squirros," after the cute, fuzzy tail of a squirrel. Ask your kids to come up with their own names for your creations. If they do, I'd love to hear them. Send me a comment here, maybe we can come up with some really unusual ones.


PUMPKIN PIE
CHURROS

I've added autumn flavors to these traditional churros. Try your own flavorings, too. You can add a variety of extract flavorings to the batter, dip them in melted chocolate or drizzle with jam. Any way you make them they are a treat, so have fun and make sure you share!

The frying part is definitely NOT for the kids to do, but have them help roll them in the sugar coating. It is simple and fun to do.

Yield: About 1 dozen 4-inch churros
INGREDIENTS FOR CHURRO BATTER
1 cup water
2 tablespoons brown sugar
1/2 teaspoon salt
1/3 cup butter
1 cup unbleached flour
1 teaspoon pumpkin pie spice
2 eggs
1/2 teaspoon vanilla extract
11/2 cups vegetable oil
INGREDIENTS FOR COATING
3/4 cup sugar
1/4 cup brown sugar
1 teaspoon ground cinnamon, or to taste
2 teaspoons pumpkin pie spice
1/8 teaspoon nutmeg
NECESSARY TOOLS
Pastry bag fitted with a large star-shaped tip. Note: Disposable pastry bags are available at any craft or kitchen store and they are great tools to have around the kitchen. If you do not have a star tip, a round tip will work as well.

Paper towels for draining the cooked churros of excess oil.

TO PREPARE

Combine all the ingredients for the coating and set aside. In a 3-quart saucepan add the water, brown sugar, salt and butter, and bring to a boil. Remove the pan from the heat and add the flour and pumpkin pie spice. Stirring in the flour will take some muscle. Mix until well blended.

In a separate bowl, mix the eggs and vanilla together; add this mixture to the flour mixture. Stir until well blended and all the egg mixture is completely incorporated.

Fill the pastry bag, fitted with tip, with the churro dough.

Heat the one and a half cups of vegetable oil in a frying pan with high sides or a wide saucepan to 375°. If you don't have a thermometer, the "medium high" setting on your stove should hold the oil at around 375°. Test your oil by dropping in a small amount of dough; it should bubble up right away. If it does not, the oil is not yet hot enough and a soggy churro is no bueno! Once the oil has reached the correct temperature, squeeze a four-inch-long tube of the dough from the piping bag into the hot oil, using scissors to cut off the end of the dough tube from the piping bag. Be careful of the hot oil!

You should be able to fit four or five churros at a time in the pan. Cook each churro about one minute and then turn it over with a slotted spoon. Cook an additional minute or two until it turns a nice golden brown color. Remove the churros with a slotted spoon and place them on a paper towel-covered plate to absorb excess oil.

While still warm, roll each churro in the coating until well coated. Serve warm.


Stumble Upon Toolbar

5/26/10

SUMMER, IT'S IN THE BAG


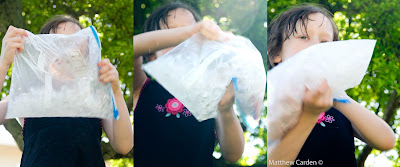
It's hard to believe a year has gone by since I wrote my first article for Edible Magazine. I really love writing Stone's Soup Corner, I get ideas from my editor and we form fun stories for our readers. I never know what I will write about until I find out the "theme" of the magazine, and I like it that way. So I hope you have enjoyed reading these as much as I have enjoyed writing them. I also added some fun photos here that were not used in the magazine, so enjoy.

It's a typical summer play date and the kids are in the kitchen eating juicy strawberries we brought home fresh from the farmers' market. They are loving them, drippy and bursting with strawberry flavor–pure joy. At that perfect moment, we hear a dim jingle. As it gets closer, the kids' ears perk up. It's the ice cream truck! They run to the window as he zooms by, the jingle fading away.

Instantly I get two sad looks, big puppy dog eyes that mean "why can't we have that?" I curse that truck under my breath for distracting the kids from a lovely moment with nature and attempting to convince them that treats only come in cellophane wrappers containing gumballs and blue dye.

In that moment I knew I wanted to do something special for the kids. My first thought–let's make homemade ice cream! On second thought–homemade ice cream is delicious, but it does take a long time with cooking the custard, waiting for it to cool, and making sure the machine is frozen or packing the churn with ice and rock salt. Too much time and effort I decided–the kids want instant gratification anyway, the truck is long gone and they now have sugar on the brain. I've lost them. So, I thought, do I use this as an opportunity to talk to them about the importance of knowing where your food comes from and what is in it, or just try to have a good time with them? No one wants to be told that the ice cream truck is a bad thing. Then I remembered that there was a way the kids could actually "hand churn" the ice cream themselves, using a very simple, but delicious, ice cream recipe! So, I say "geez, he always drives so fast down our street, we'll never catch him. How about we make our own ice cream? Let's use those strawberries!"

After all the cheering subsided, I gave each of them an egg slicer and a bowl of strawberries and set them to work slicing while I measured the rest of the ingredients. They would do the actual churning themselves!

This is where we live today, in between two worlds. One full of fresh, natural foods and the other full of processed, manufactured foods. How do we strike a balance, educating our kids in the joys of the summer garden and still allowing them the rush of excitement they receive from the ice cream truck? Making treats like this ice cream at home is a great way to start. It doesn't really matter what you make, what matters is that you are spending time together. Teach them the process of transforming a raw ingredient into a finished dish. That is a gift that will last them a lifetime.


HOMEMADE ICE CREAM . . . IN A BAG

Use any fruit you have on hand. Soft fruits like bananas, strawberries and peaches work best if you want the kids to be able to do the slicing using an egg slicer. This is a great use for all those gallonsized zip top bags you've been rinsing out and saving.

Makes 1 serving

INGREDIENTS

1/2 cup organic half-and-half, soy milk, goat's milk or whole cow's milk
1/4 cup fresh orgnic fruit (peeled, diced or chopped, as needed)
1 Tbs sugar
1/4 tsp vanilla
1 sandwich-sized zip top bag
1 gallon-sized zip top bag
3 cups crushed ice
1/3 cup rock salt

TO PREPARE

Place the first four ingredients in the smaller zip top bag and seal. Make sure it is tightly closed! You may want to double bag here for extra insurance against spillage.

Place the ice and rock salt into the larger zip top bag and then insert the small bag with the ice cream mix, snuggling it down inside the ice and salt. Seal the large bag.

Once you have assembled the bags, squeeze and knead the bags together until the ice cream has frozen–about 10 to 15 minutes. If you are making this with at least a couple of kids (or even one child and yourself), it is fun to stand across from each other and toss the bags back and forth – gently – to get the "churning" process started. They will need to complete the freezing process with the squeezing and kneading. Once the ice cream is frozen, remove the small bag, wipe off the water and salt, unseal it and eat your delicious, homemade ice cream straight from the bag. No need to even dirty a bowl!
(Warning:do not empty salty water onto the lawn, it will kill it.)

FUN FLAVORINGS TO MIX IT UP:

Chopped nuts, fresh cherries, chocolate syrup, chopped basil or mint, almond extract, crushed cookies, mini chocolate chips, shredded coconut, chopped dates, a spoon full of jam or jelly, 1/4 teaspoon balsamic vinegar, a spoonful of peanut butter or sunflower butter

Here is a list of some great camps in edible Marin & Wine Country where your kids will learn where their food comes from – and have fun doing it!


Stumble Upon Toolbar

3/24/10


THE LITTLE DIPPER

SEEDS TO STARS

BY JENNIFER CARDEN

Feeding the birds is a nice thing to do, but feeding your

kids can be even more fun!


If you missed the new Spring issue of Edible Marin Wine Country you can still read my article right here.

Do you remember when you were in grade school

and you made pine cone feeders for the birds?

Picture this—the teacher gave out a paper plate

with a bit of peanut butter that you spread onto a pine cone

and then rolled the whole thing in birdseed. IF it made it

home in one piece, you hung it up in a tree, and, if you were

lucky, the birds came to enjoy it and you got to watch them

feed at your very own creation.

For some, seeds are strictly “for the birds.” I have noted that

this is particularly true for children. Getting kids excited

about any food can be a real challenge, but texture seems to

be a particularly important component in whether a child

will embrace a new food. Kids can be picky about certain

things like large pieces of tomato or onion in sauce, and

nothing can be too gritty, too slimy, or too green—just to

mention a few. Seeds definitely fall into this texture category:

seeds in their bread, on bagels, in rice or in trail mix.

But, it is spring and a time for renewal and attention to

healthy eating. The seed family, which includes nuts, beans

and grains, contains fiber and essential fatty acids which are

vitally important to growing bodies and, especially, brains. In

addition, they can add great dimension and flavor to foods.

To make sure your child is getting his or her seeds, and

liking them too, try making this yummy protein powder to

have on hand to sprinkle over a variety of different foods—

we think it is exceptionally delicious sprinkled on a sliced

banana, drizzled with honey and served with thick Greek

yogurt. They should too!


SEED PROTEIN POWDER:

1 Tbsp. Flax seeds

2 Tbsp. Sesame seeds

2 Tbsp. Sunflower seeds


Grind all three seeds together in a coffee grinder or blender.

May be stored in the refrigerator for up to one month.


The most nutritious seeds in the world:


Flax Seeds

The protein in flax seeds is easily digested and contains all

the amino acids needed for building a strong body.


Sunflower Seeds

These little gems are packed with nutrients. In fact, they are

considered by many to be the most perfect in nutrients, supplying

all the body’s needs except vitamin D, which can be

easily obtained by standing in the sun. Birds at a feeder will

pick through all the other seeds to get to the prized sunflower

seed. Birds are smart!


Pumpkin Seeds

Pumpkin seed oil contains omega 3 and omega 6 fatty acids

making them highly nutritious. Pumpkin seeds are also a

great source of vitamin A, calcium and iron.


Sesame Seeds

Sesame seeds contain 19% protein, compared with 13% in

eggs. They are also an excellent source of B vitamins and

other minerals.

Because seeds contain such a large amount of oil, they can go

rancid fairly quickly. Their shelf-life will be extended by roasting

them in the oven or toasting them on the stove top. This will also

change their flavor, however. Additionally, raw is the most healthful

way to eat seeds (and most nuts) because the essential oils in

them may be damaged by the heat. You can tell if seeds are rancid

because they will have an acrid or “off” odor. Try a taste test with

your kids, raw vs. toasted, to see which they like better.


Lil' Dipper

Be a Star and Connect the Dots.


This is a fun way to learn about the stars and eat healthy

at the same time. If you have a peanut allergy or would

just like to try something new, use sunflower butter or

another alternative butter.

YOU WILL NEED:

• A plate with a rim

• Zip top bag

• 1/4 cup peanut butter or sunflower butter, at room

temperature

• 1/2 cup assorted unshelled seeds (sunflower, flax, sesame,

and/or pumpkin)

• Celery or carrot sticks and crackers


Fill the bag with the nut butter, seal and squish down to

one corner. Snip a very small tip off one corner of the bag.

Make dots on the plate in the configuration of the Little

Dipper. (See photo on page 44.)

Have your child use the peanut butter baggie to connect

the dots making a “Lil’ Dipper” shape. Fill in the “ladle”

of the dipper with peanut butter.

Sprinkle the seeds over all the peanut butter lines, letting

him or her decide on the colors and sizes of the seeds they

want to use. Shake off the excess seeds and use the celery,

carrot and crackers to scoop up the seed-y masterpiece!

Stumble Upon Toolbar

6/9/09

Camps that whet the appetite, summer cooking camps your kids will love


Another great listing from Edible Magazine... Stone's Soup column.


Summer Cooking and Farm Camps and Clubs for Kids

There are wonderful opportunities around Marin and Wine Country to get your kids out into nature and into the kitchen this summer, learning where their food comes from while getting their hands dirty!

Check out the newest project I am working on, this farm to table camp should be lots of fun at Connolly Ranch.


Dirt to Dine Adventure Camp for Budding Chefs,

Connolly Ranch (in collaboration with Chef Michael

Chiarello of Bottega/NapaStyle)

Napa, ages 5–11

Camp dates August 3–7

Connolly Ranch.

For more on this camp e mail me


What’s Cooking Cooking Classes for Kids

San Rafael ages 6 and up

camp dates - July and August www.whatscooking.info


Slide Ranch Camp, Muir Beach 5 & up June-August www.slideranch.org


Devil’s Gulch Camp Nicasio 6 & up June-August www.devilsgulchranch.com


Children’s Garden Co. Organic Farm Club, Sonoma for the whole family, year round www.childrensgardenco.com


“Eat Draw and Be Merry,” Napa, grades 1-8

call or email for Summer 2009

andrapaints@comcast.net or 707.333.1641


Summerfield Farm Camp, Santa Rosa 4 thru 12 June and July www.summerfieldws.org


Pine Point Cooking School, Sausalito grades 5-10 June–August www.pinepointcooking.com


Operation Chef, San Rafael 7 thru 18 June–August www.operationchef.com


Apple Blossom Day Camp, Sebastopol K-5 June-August 707.823.3463


Stumble Upon Toolbar

6/2/09

Sneak Peek at Stone's Soup Corner

Announcing Edible Marin Wine Country Magazine Premiere Issue (drum roll please)

edible Marin and Wine Country Summer 2009

We here in Marin, Napa and Sonoma are thrilled to be contributing to a great new magazine. Read Stone's Soup Corner my kid centric foodie column. See The fabulous cover that Matthew shot, and find out about seasonal foods and recipes. Grab one at your local natural foods store or farmers market, you can always subscribe. We hope you enjoy it!


Because peas are coming into season I changed this recipe to accommodate fresh peas but if you are unable to get them use frozen.

On the searing summer days of my childhood, I spent

long hours outside with other kids, playing hide

and seek, getting dirty, and making mud pies. The

moment we heard the bells of the ice cream truck, our ears

perked up in unison and we raced off to get our ice cream treat.

Now, 30-something years later, I hardly ever see an ice cream

man. Maybe it's because grocery stores today are stocked

with so many more ice cream choices, or maybe it's because

kids play indoors more. Whatever the reason, the summer

school break presents a great opportunity to spend time with

your kids, cooking with them and teaching them about food

and family. It should be easy to entice them into the kitchen

to help create these unique and deliciously cooling Minty

Pea Pops and Veggie Corn Pops.

They may not get to chase

the ice cream man, but they will be having fun, enjoying

their dessert, and eating their veggies, too!

Sweet Veggie Pops

A New Twist On an Old Treat

By Jenifer Carden


Minty Pea Pops

Peas on a Popsicle stick? Just tell them it tastes like mint–chocolate

chip ice cream—but these are not quite ice cream and not quite vegetable.

They are now a staple in our house—a great dessert, snack, or

treat on a hot day. Have your kids help shop for and shell the peas.

You'll love it when your child asks for a Pea Pop!

Makes 6 cube-shaped pops

8 ounces cream cheese

1 cup shelled sweet English Peas

1/4 cup sugar

1/2 teaspoon peppermint extract

1/8 to 1/4 cup semi-sweet mini chocolate chips

6 Popsicle sticks or wooden craft sticks

Place the cream cheese, peas, and sugar in a microwave-safe bowl

and microwave on high for 20-second intervals until the cheese is

softened to room temperature.

Using a blender or food processor, puree these first three ingredients

into a smooth paste. Add the extract and mix again, scraping the

bowl frequently. Stir in the chocolate chips by hand.

Place the mixture into a food grade plastic bag and cut about 1/2 inch

off of one of the bottom corners. Squeeze the puree into an ice cube

tray or mini muffin tin, place 1 Popsicle stick into each serving and

freeze until solid, about 1 hour. You may also spoon the puree into the

molds. Depending on your freezer, you may have to let them freeze for

up to 4 hours. For best results, make and freeze these overnight.

Once the pops are frozen, remove them from the molds by twisting

just like ice cubes. You may need to go around the edge with a warm

knife if you used a muffin tin. Sealed in an airtight container, these

will keep for up to 1 month.

Variation: Sprinkle a layer of graham cracker crumbs into the bottom of the ice

cube trays or muffin cups and place the corn puree on top; the result will look and

taste similar to a mini cheesecake on a stick.


Stumble Upon Toolbar